Connect Claude.ai to AssinaJá
By the end of this guide, you ask Claude to send a document for signature and it sends it.
There are two sides: first create the key in AssinaJá, then point Claude at it. The order matters — the authorisation asks you to pick a key, and if none exists the process stops halfway.
Before you start
Section titled “Before you start”- In AssinaJá: be the organisation’s Owner. Only the Owner creates API keys, and the authorisation only lists keys of organisations you own — see Roles and permissions.
- In Claude.ai: a plan that allows custom connectors. As of this guide, the Free, Pro, Max, Team and Enterprise plans do, with Free limited to one connector.
1. Create the key in AssinaJá
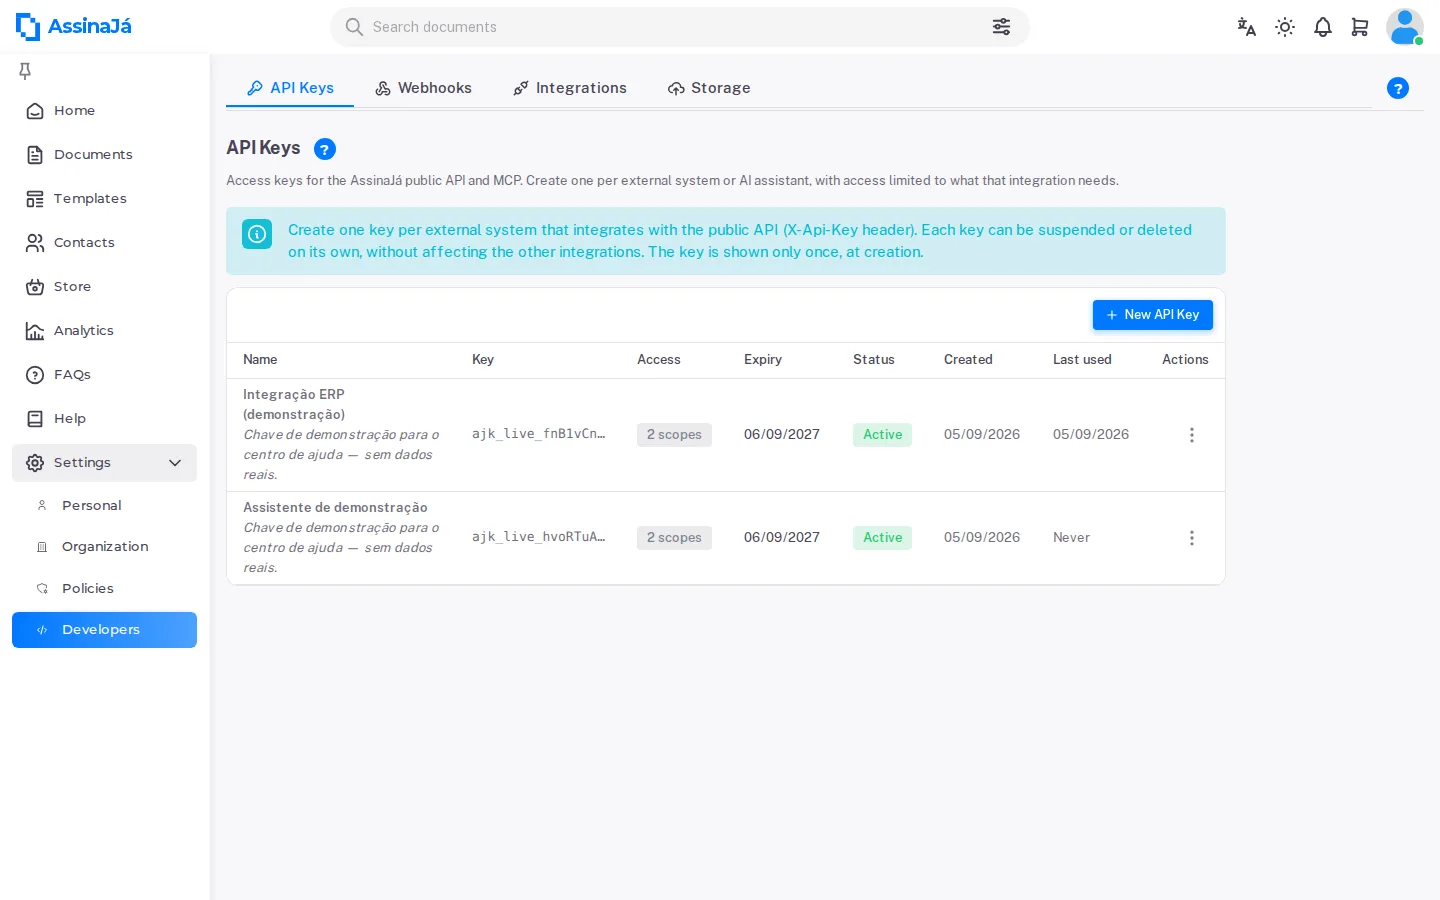
Section titled “1. Create the key in AssinaJá”Under Settings → Developers → API Keys, create a key with a name that identifies the connection — e.g. Claude.ai; you will need to recognise it six months from now. The steps are in Create an API key, and the permissions to tick for a first connection under Scopes.
2. Add the connector in Claude.ai
Section titled “2. Add the connector in Claude.ai”The steps below are from the Claude.ai interface in August 2026. If the names do not match, the official guide is at support.claude.com.
On an individual account (Free, Pro or Max):
- Open Customize → Connectors.
- Choose +, then Add custom connector.
- For the server address, paste:
https://app.assinaja.pt/mcp
- Choose Add.
On a Team or Enterprise account, the connector is added once by the owner, under Organization settings → Connectors → Add, going through Custom and choosing Web. After that, each member goes to Customize → Connectors and chooses Connect to authenticate with their own account — and therefore with whichever key they pick.
3. Authorise
Section titled “3. Authorise”When you add the connector, Claude opens the AssinaJá authorisation page. It is titled Connect Claude to AssinaJá and has two steps.
If you are not signed in yet, you sign in first.
Step 1 of 2 — choose the API Key to use
Open the list — it shows — select an API Key — — and pick the key you created. Then Continue.
You have no active API Key.
Create one in the backoffice under Settings → API Keys and retry the connection.
If you see this, you skipped step 1 of this guide, or the key belongs to an organisation you are not the Owner of.
Step 2 of 2 — confirm the access you are granting
Here you see the exact list of what the key allows. It is your last chance to notice you ticked one permission too many.
By confirming, it is recorded that you authorized Claude to use this key. You can cut the access at any time by suspending or deleting the key under Settings → API Keys.
Choose Authorize access. You get Establishing the connection — “Hold on — we are finishing up and sending you back to Claude. Do not close this window.” — and are returned to Claude automatically.
What each step checks, and what is recorded, is in Authorise and revoke an assistant.
4. Confirm it works
Section titled “4. Confirm it works”In the conversation, ask for something that only works with the connection up:
List the templates available in AssinaJá.
You should get your organisation’s real templates. If you get a generic answer about AssinaJá with no list, the connector is not being used — check that it is enabled under Customize → Connectors.
A second, more useful test:
Create a document from template X for João Silva (joao@exemplo.pt) and leave it as a draft.
Then go to the document list and see if it is there. That is how you verify the key is bound to the right organisation.
5. Cut access
Section titled “5. Cut access”You do not disconnect a connector like this from Claude’s side — you do it from the key’s side.
Under Settings → Developers → API Keys, Suspend the key. Claude’s access drops on the next request. Suspending is reversible and deleting is not — if you are just testing, or suspicious of something, suspend. See Authorise and revoke an assistant.
If it goes wrong
Section titled “If it goes wrong”| What you see | What to do |
|---|---|
| You have no active API Key. | The key does not exist, is suspended, or expired — or you are not the Owner of the key’s organisation. Create or reactivate one. |
| Claude shows no AssinaJá tools | The connector is not enabled, or the key has no permissions ticked. |
| Claude sees documents but cannot create them | Documents — create is missing from the key. Edit it under Settings → Developers → API Keys. |
| Claude creates but nothing is sent | Expected without Documents — publish, or with the draft policy enabled. |
| The connection fails when adding the connector | Check the OAuth Advanced settings were left empty. |
When “Claude cannot do X”, it is almost always a missing permission on the key — see The assistant only sees what the key allows.
Related
Section titled “Related”- What MCP is — the security model behind this
- Connect ChatGPT to AssinaJá
- Create an API key
- Deliver a file to an assistant